

How To Copy Skin Weights In Maya
Easily transfer model weighting information in Maya 2013
This is a tutorial for transferring model weighting in Maya 2013. For more on the software, see our Maya 2013 review.
Editing weighting information on any model can be a pain. You adjust the weights on the hand, mirror them, and suddenly a few stray weights on the thigh now move with the index finger. Editing how a character deforms can be a delicate balancing act.
Once you have one model correctly weighted, however, you can easily transfer this data to lower-level-of-detail models on the same rig. You can also transfer this data to a completely different character model, on a separate skeleton, without resorting to exporting and importing weight maps.
Transferring weights between models is achieved through the Skin > Edit Smooth Skin > Copy Skin Weights tool. With two models bound to the same skeleton, you simply select the source model and then add the destination to the selection before activating the Copy Skin Weights tool. The default option of Closest Point On Surface is usually good enough in most cases, with a minimum amount of clean-up needed. It's a simple solution, without a single bitmap having to be exported and then remapped to each joint. But what about transferring to a separate model and rig?
This takes some out-of-the-box thinking, but it's just as straightforward. What you need to do is almost trick Maya into thinking both models are on the same skeleton before copying the weights.
If your source model's skeleton is rigged – that is, it has a layer of IK, or constraint controllers on top of it – you first need to disable all these. You do this so you can physically manipulate the base skeleton free from any other influence. If you go to Modify > Evaluate Nodes > Ignore All, this will temporarily disable all the nodes in the scene.
With the base skeleton now free from its restrictive rig you can select each joint in turn, and while holding down [V], snap it to the corresponding joint on the destination skeleton. In other words, snap the head joint to the matching head on the destination, the thigh to the thigh and so on.
It's fine if the skeletons have differing joint numbers – just stick to the main ones on your destination rig. Also, don't worry at this point about how your source model looks – it will be stretched, twisted and looking like something out of The Thing, but you're only interested in the weighting information, so this isn't an issue.
With the source stretched to fit the shape of the destination model, you can now open up the Copy Weights tool again. If you select your source and then destination models and run the tool with the default settings, you may get lucky, but you might also not get the result you want.
By default, Maya will be searching for the vertices closet to the destination model, and depending on how your source model is now looking, the actual mesh may be much thinner or thicker than the destination model now that it's been adjusted.
Which setting you use will depend on the models you're working with, but here's a quick rundown of what each main setting will do. Closest Point On Surface finds the closest point between the source and destination models. Ray Cast will use a more complicated ray casting solution to search for the best value between two points, and then soften the result. Closest Component will use the nearest vertex or polygon, and use the exact value, without smoothing. UV Space opts to use the model's actual UV coordinates to calculate the transferal of weights; Autodesk recommends this option for models of differing sizes and proportions.
Once your weights are transferred, you can discard the source assets, then tidy up any stray weighting on your model. This is a quick and dirty way to transfer weights between two separate models, but it beats exporting maps. At the end of the day, any extra time you can claw back is worth it, and this approach could shave at least an hour or two off your workflow by giving you a much-needed head start with your weight painting.
Is importing a source model always best?
The best way to add a model to a scene
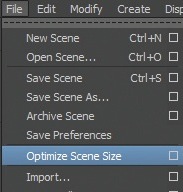
If you know that your source model will eventually be discarded, importing and deleting it may still leave redundant nodes in your scene that Optimize Scene Size won't touch. This means larger file sizes.
Try referencing instead
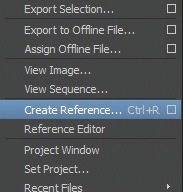
Referencing your model into the scene enables you to keep the scene elements separate, while also having full control over the skeleton. To do this instead of importing, go to File > Create Reference.
A cleaner scene
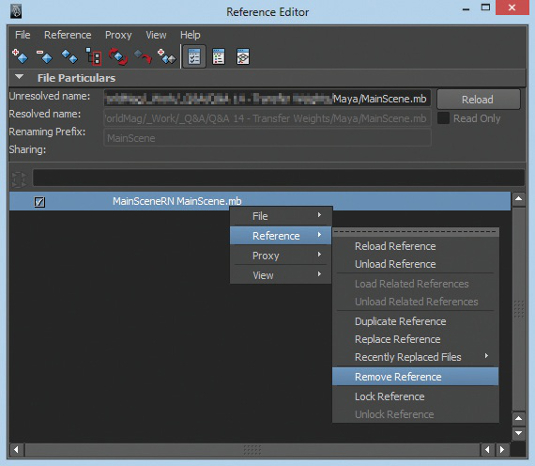
When you're finished, simply open the Reference Editor and remove the reference from your scene, which will remove everything associated with it and leave you with a much cleaner, smaller Maya file.
Antony Ward has been provoking pixels since the early 1990s. He has worked for some of today's top studios and written three books
Discover 20 top free 3D models
Related articles
How To Copy Skin Weights In Maya
Source: https://www.creativebloq.com/easily-transfer-model-weighting-information-maya-2013-7134080
Posted by: fernandezheratat.blogspot.com
0 Response to "How To Copy Skin Weights In Maya"
Post a Comment